
Introduction
Cypress is a powerful testing framework tool that simplifies the process of end-to-end testing for web applications. It provides an intuitive and easy-to-use interface, making it an ideal choice for developers and quality assurance teams alike. In this guide, we will walk you through the process of setting up Cypress testing from scratch, ensuring that you can leverage the full potential of this remarkable tool.
Cypress tests run directly in the browser, which means that you don’t need to set up a separate testing environment. Cypress also provides a number of features that make it easy to write and debug tests, such as real-time reload, time travel, and visual debugging.
Why Choose Cypress for Testing?
There are several reasons why Cypress has gained immense popularity among developers for testing web applications:
- Easy installation and setup process
- Intuitive and powerful API for writing tests
- Real-time reloading and automatic waiting for page elements
- Built-in time-travel debugging and live-reload capabilities
- Seamless integration with popular testing frameworks and CI/CD pipelines
- Comprehensive documentation and a thriving community for support
Setting Up Cypress Testing
To begin using Cypress for testing your web applications, follow these steps:
- Install Node.js if you haven’t already.
- Create a new project directory.
-
Navigate to the project directory and install Cypress:
# Install Cypress via npm:
npm install cypress --save-dev

# Install Cypress via Yarn:
yarn add cypress -D

# Install Cypress via pnpm:
pnpm add cypress -D
-
Start the Cypress test runner and open the Cypress Launchpad:
npx cypress open
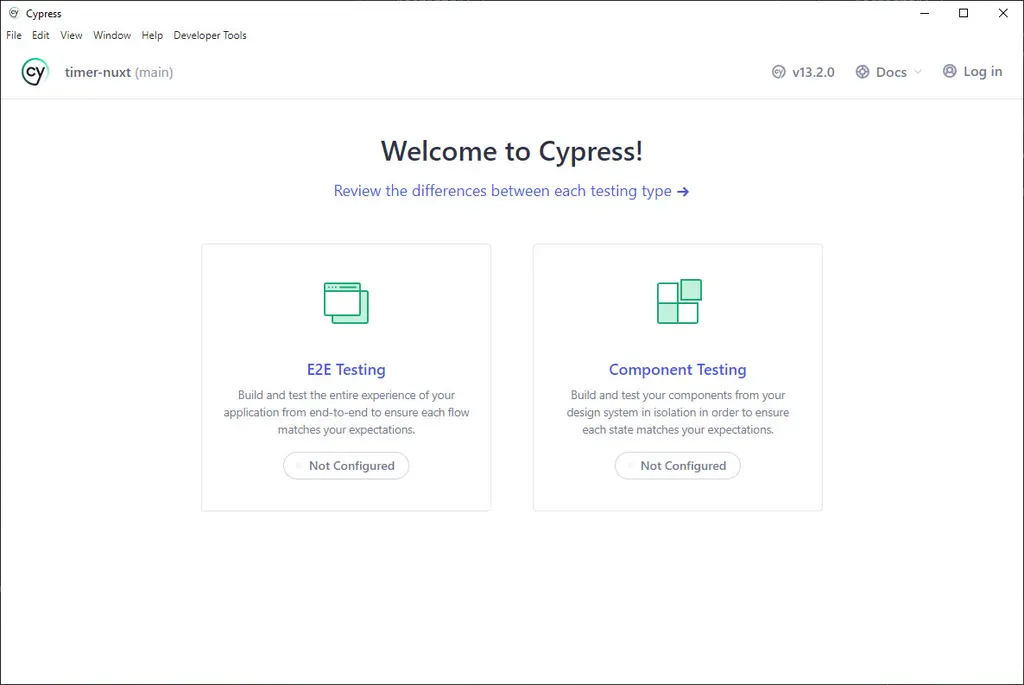
Cypress Launchpad -
Click on E2E Testing, Cypress will create the basic configuration files.
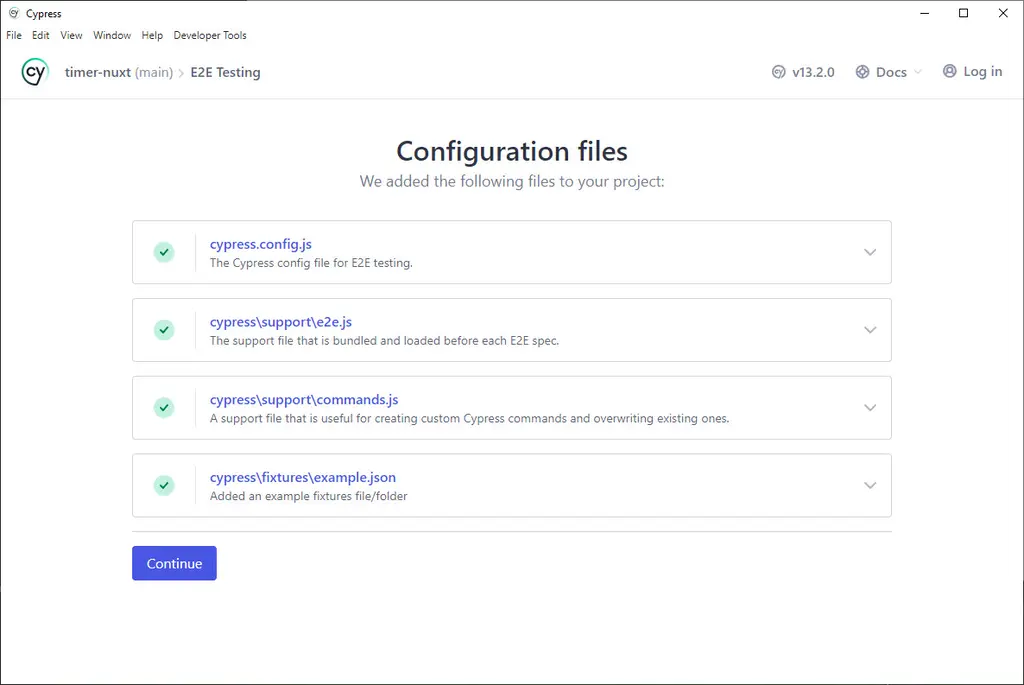
Cypress Configuration Files -
Select the browser to run test on, and click the green “Start E2E Testing in …” button.

Choose Browser to Run Test -
Click on the button “Scaffold example specs”.
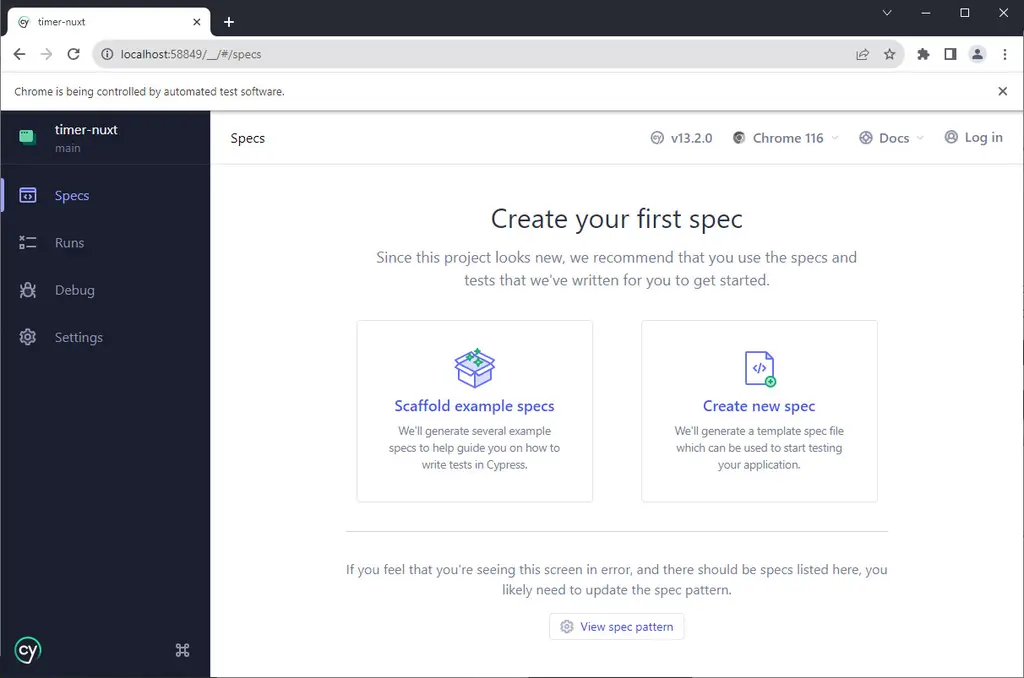
Browser Test Screen - Cypress will create spec examples in folder
/cypress/e2e. -
Clicking on one of the test spec (e.g. todo) will start Cypress testing using that spec.
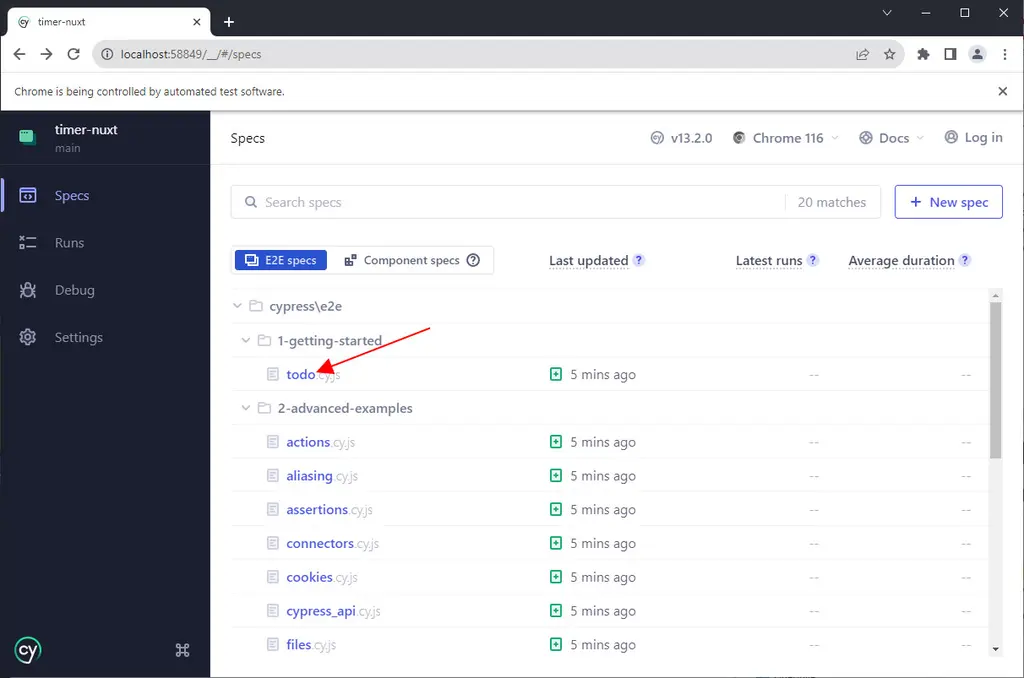
Select Spec to Test -
You can add your own spec in folder
/cypress/e2e
Example Cypress Test
Here is an example of a simple Cypress test:
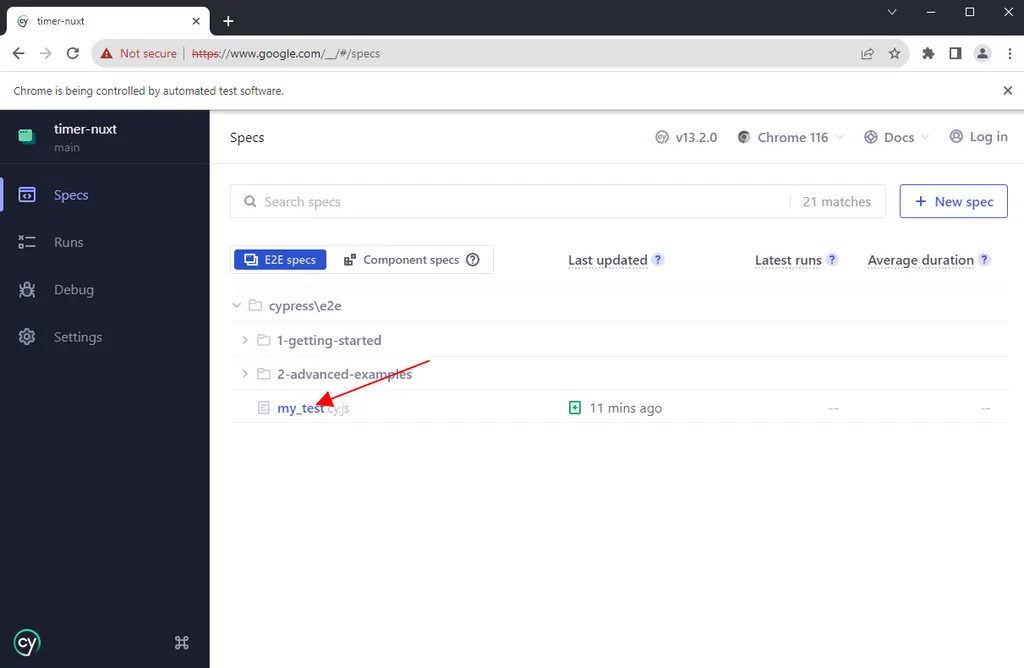
// cypress/e2e/my_test.cy.js
describe('My First Test', () => {
  it('should visit the Google homepage', () => {
    cy.visit('https://www.google.com')
  })
})
This test will visit the Google homepage and verify that the page loads successfully. To run the test, simply click the “my_test” spec.
Tips for Writing Cypress Tests
Here are a few tips for writing Cypress tests:
- Start by writing simple tests. Once you have a good understanding of the basics, you can start writing more complex tests.
- Use descriptive names for your tests. This will make it easier to read and understand your tests.
- Use Cypress commands to interact with your web application.
- Use assertions to verify that your web application is behaving as expected.
- Use Cypress fixtures to store data that you need to use in your tests.
- Use Cypress plugins to extend the functionality of Cypress.
See examples of Cypress test cases and commands here.
Conclusion
Cypress is a powerful and easy-to-use end-to-end testing framework. It is a great choice for testing both SPAs and traditional web applications.
If you are new to Cypress testing, I encourage you to check out the Cypress documentation and tutorials.